Last modified: July 21, 2003
This note will teach you how to make cut-outs of pictures and place them against another background. I assume that you have Paint Shop Pro from Jasc, and that you have at least a little experience in using it. To see examples of using this technique, look here.
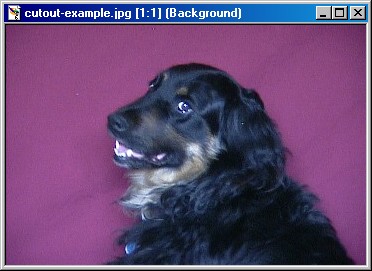
You will need to start with an image that has a more-or-less solid color background that is distinct from the colors along the boundary of the foreground image. For example, here's Carl in front of a red sheet tacked to the wall:
The background is mostly one color, but has some wrinkling and shadowing. The important thing is that it's very different from Carl's own colors, with the possible exception of his tongue.
The next step is to give the picture a "mask". Choose "Mask/New/From Image..." (that is the "Mask" menu, "New" sub-menu, "From Image..." menu item) and set the options as follows:
Click on OK. You won't see any difference, but the picture now has a mask, which allows some portions to be fully or partially transparent.
Next choose the "magic wand" tool from the tool palette on the left
side of PSP's main window (![]() ).
Find the "Tool Options" window and set the options to something like
the following:
).
Find the "Tool Options" window and set the options to something like
the following:
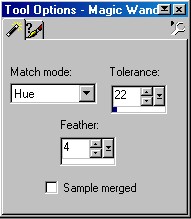
The "match mode" is "hue", meaning to match based on the hue and be forgiving about lightness and saturation. There are other choices. The "tolerance" is something that will need tuning based on the picture. A smaller number is less forgiving about inconstancy of background image hue. A larger value is more forgiving, which is sometimes helpful, but it can then confuse some of the foreground image as being background.
Next, left-click in the background. You should see something like this:
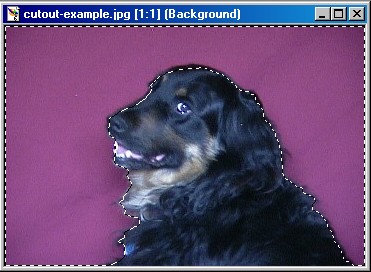
Notice that the dashed curve is a bit into the foreground image. That's because of "feathering", which gives a soft edge to the cutout. We asked for a feathered border of width four, so in our cutout, there will be a four-pixel-wide border that smoothly shifts from fully transparent to Carl's image. In some cases, you'll need to do this step more than once, possibly fiddling with the tolerance tool setting.
Next, hit the delete key to remove the background. You should see something like:
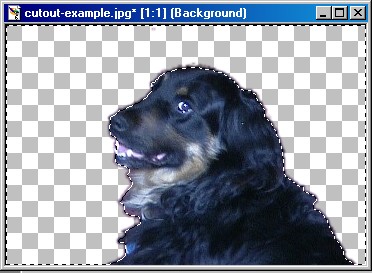
The grey&white checkerboard indicates transparency. If you see some junk left over, hit delete again until it's gone. If you delete too much, just undo with control-Z (or "undo in the edit menu). In this case, a few more deletions would trim away some of the reddish fringe, but often it makes the picture too rough around the edges or erodes it too much.
Next, crop the image to remove excess background area, using the cropping
tool (![]() ). Click
and drag to define a cropping rectangle. You can adjust the edges or
corners after making a first rough choice. Then move the mouse cursor inside the
crop rectangle and double click:
). Click
and drag to define a cropping rectangle. You can adjust the edges or
corners after making a first rough choice. Then move the mouse cursor inside the
crop rectangle and double click:
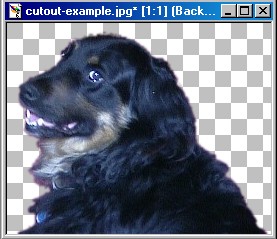
This cropping step isn't really necessary, but it saves disk space. Also, it could be done before the magic wand rather than after (and probably should be, now that I think about it.)
Now that we have a cut-out image, choose a suitable new background for it. For example:
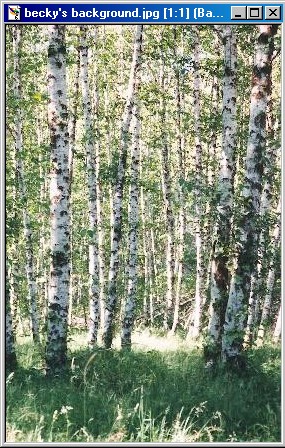
This image and the one of Carl are both 24 bit images. If either or both of the ones you are using are 8-bit (256 color) images, you'll need to convert them before doing the cutout and/or composition. Use "Colors/Increase Color Depth.../16 Million". If you're not sure, do "View/Image Information".
Now select the cutout window, do control-a to select all, and control-c to copy to the clipboard. Then select the background image window and do control-l to paste the cutout as a new layer on the background. Grab the foreground image and move it into place as desired.
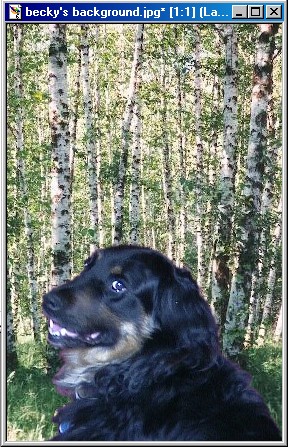
You can still move the foreground image around, or resize, rotate, flip it, etc. Save the image as a PSP file in order to retain the transparency you just established. Use "File/Save As..." and choose the type "Paint Shop Pro (*.psp)". To get a form you can put on web pages or share with people who don't have PSP, save your work as a JPEG also. You'll get a warning that the layers of your composite image will be merged in the resulting JPEG. Don't worry, because you'll still have your PSP file as well, for future editing.
Now, go be creative, and have fun!